Easy and edible DIY homemade Moon sand recipe that uses just 2 ingredients - flour and vegetable oil. Make it with your kids and you have a great sensory bin toddler activity that the kids will love.
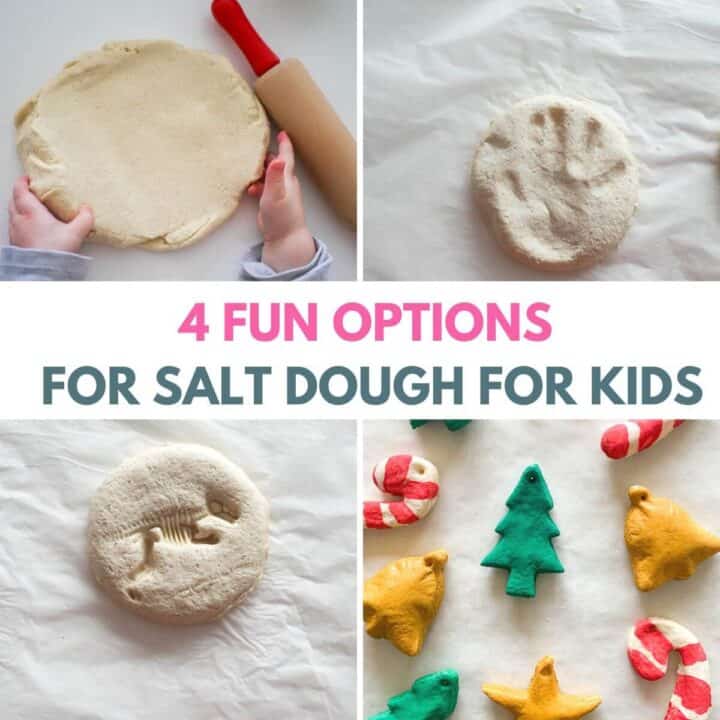
This was inspired by our easy salt dough recipe for kids that kept our kids busy for hours.
If you are like us you are always trying to find ways to keep your kids entertained and stimulated while not having a lot of mess and giving yourself an option to sometimes just sit and watch.
This is why this homemade moon sand recipe is great.
Jump to:
What is moon sand?
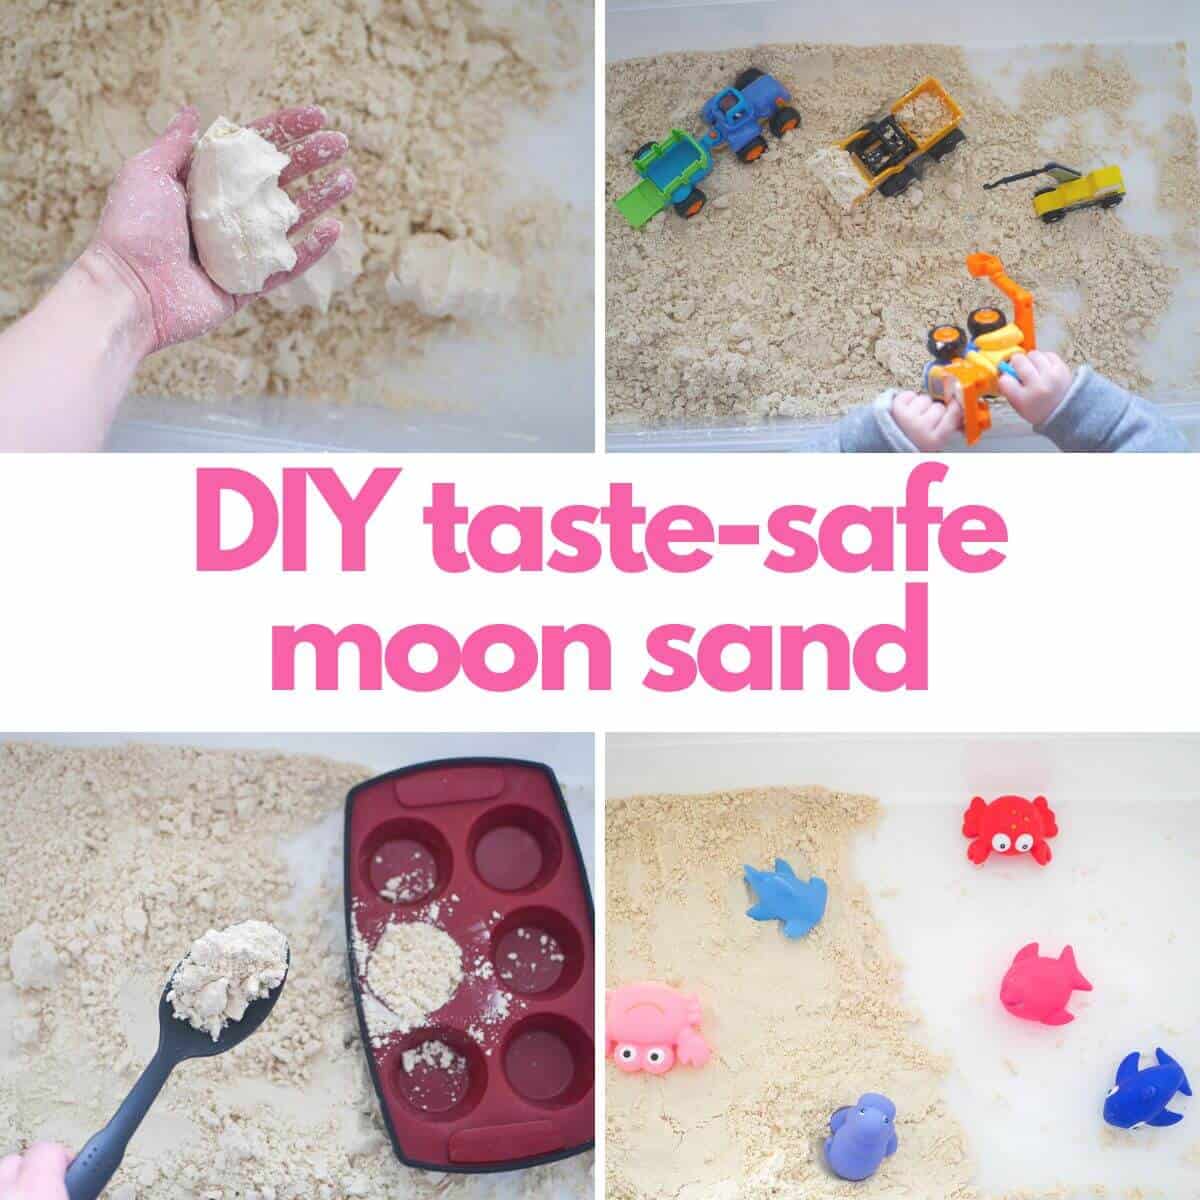
Moon sand is a great sensory experience for kids. It is basically moldable sand, what real sand would be when you add water to it.
You place it in a big plastic box and it is a more mess-free than regular sand and yet lets kids play and explore the same as they would with wet sand.
Store-bought versions are usually not taste-safe and can also be much more expensive than just flour and cheap vegetable oil.
Why we love this recipe:
- edible moon sand for toddlers, babies and kids
- great for babies 6 months +
- easy recipe
- only 2 ingredients
- can be made gluten-free
- stimulating sensory play
- make with kids
- once made it can be used in a variety of different ways to always keep kids entertained (see how in the Sensory Bin Ideas section below)
Jump to:
Ingredients
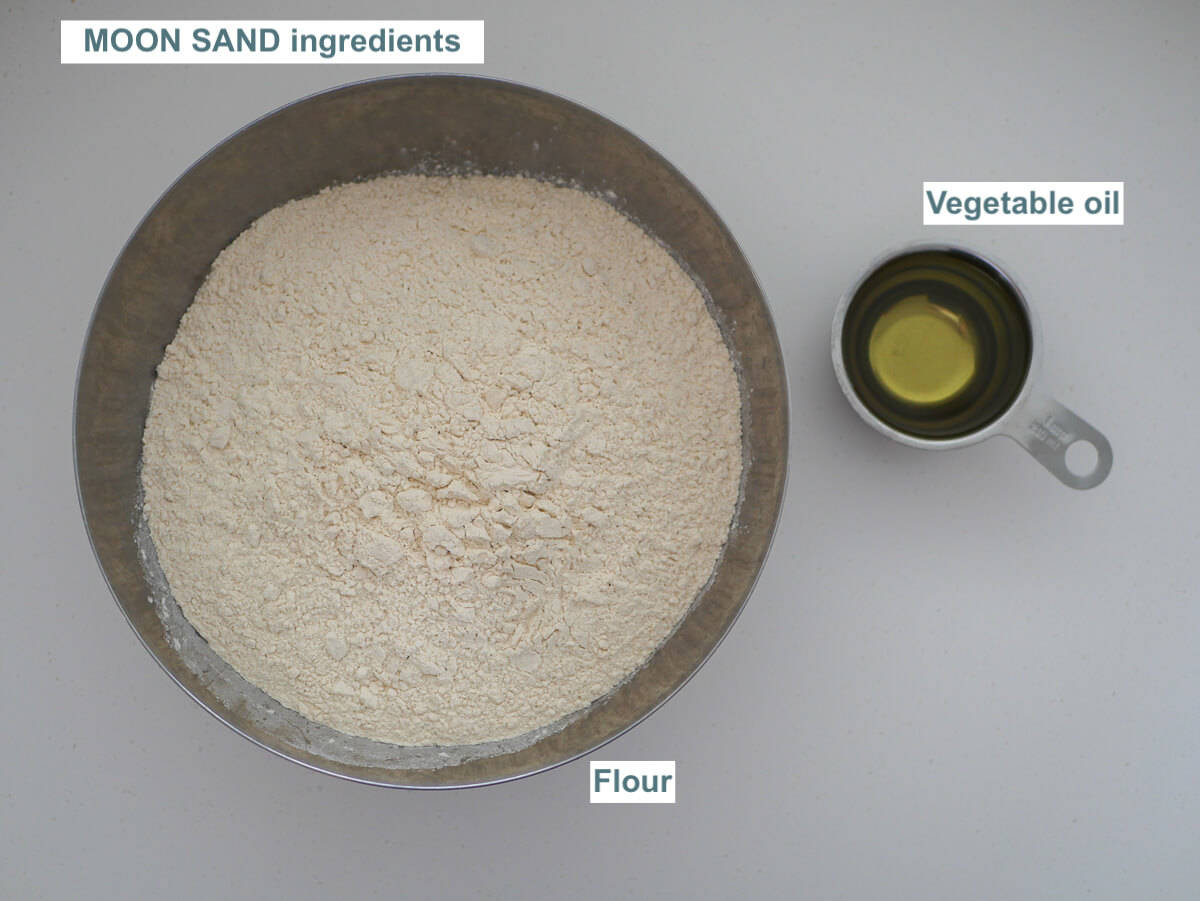
Super easy taste-safe homemade moon sand recipe using only 2 ingredients - flour and vegetable oil.
- Flour - we use plain all purpose flour, the cheapest you can find since this is really to be used for sensory play not for eating (even though this recipe does make it taste-safe). Raw flour is not considered taste-safe as it can contain bacteria so we need to quickly bake the flour beforehand in order to make it taste-safe.
- Vegetable oil - we use canola oil, sunflower oil or any cheap oil you will find. You could also use olive oil but is a more high qualily oil so no need to spend money. Coconut oil can also be used but depending on where you live and how cold it is it may solidify quickly.
See recipe card for quantities.
How to make moon sand
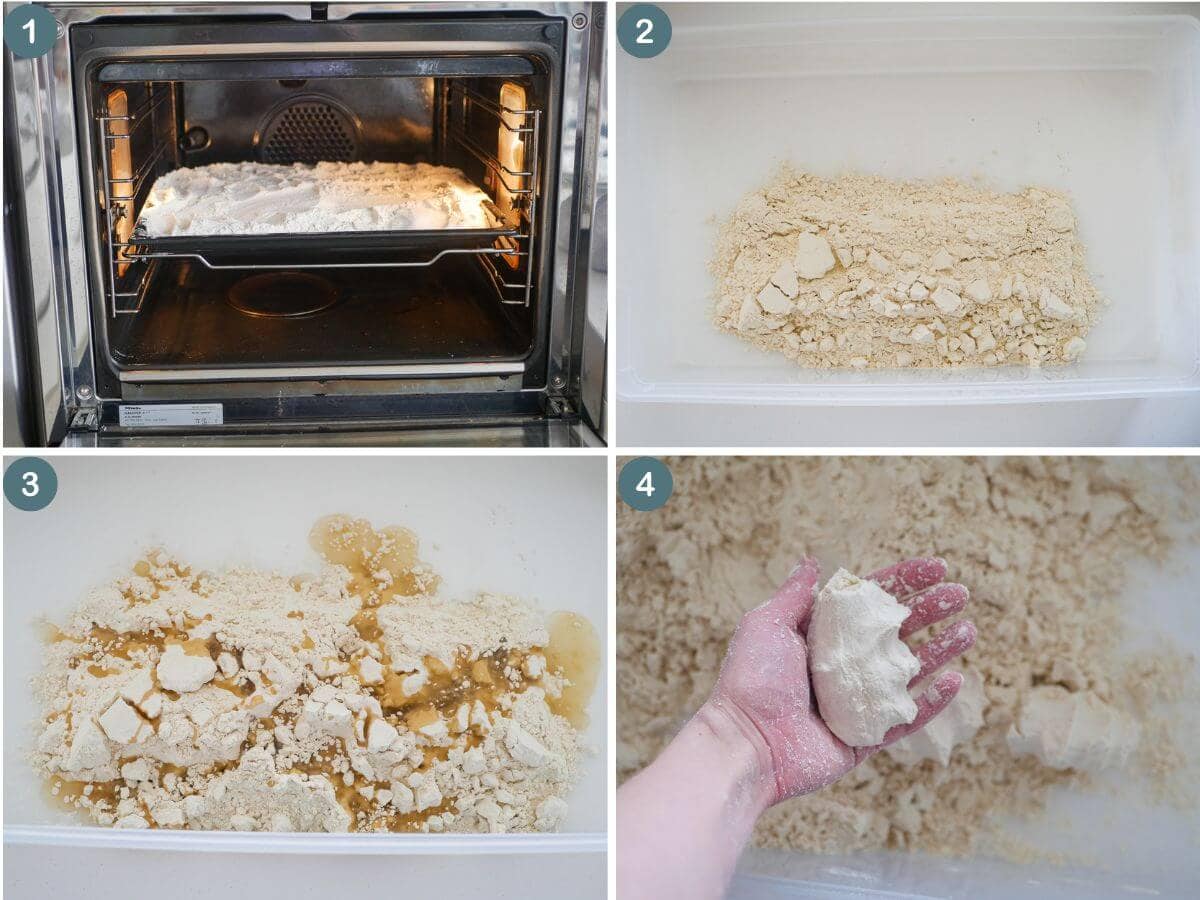
- Preheat the oven to 350°F / 180°C . Once the oven is heated place the flour on a baking sheet and place in the oven for about 5 minutes. The FDA states that the bacteria in the flour is killed at 350°F / 180°C.
- Remove from the oven and place in the container that you will be using as a sensory bin or in a large enough bowl to contain it all.
- Add the vegetable oil and mix until all is incorporated. It will take about 5 minutes. I mix with my hands (wash them before).
- Once it is all mixed through it should easily hold its form when you squeeze it, and then break up back into sand. If the mixture is too wet add more flour and if it is too crumbly add more oil.
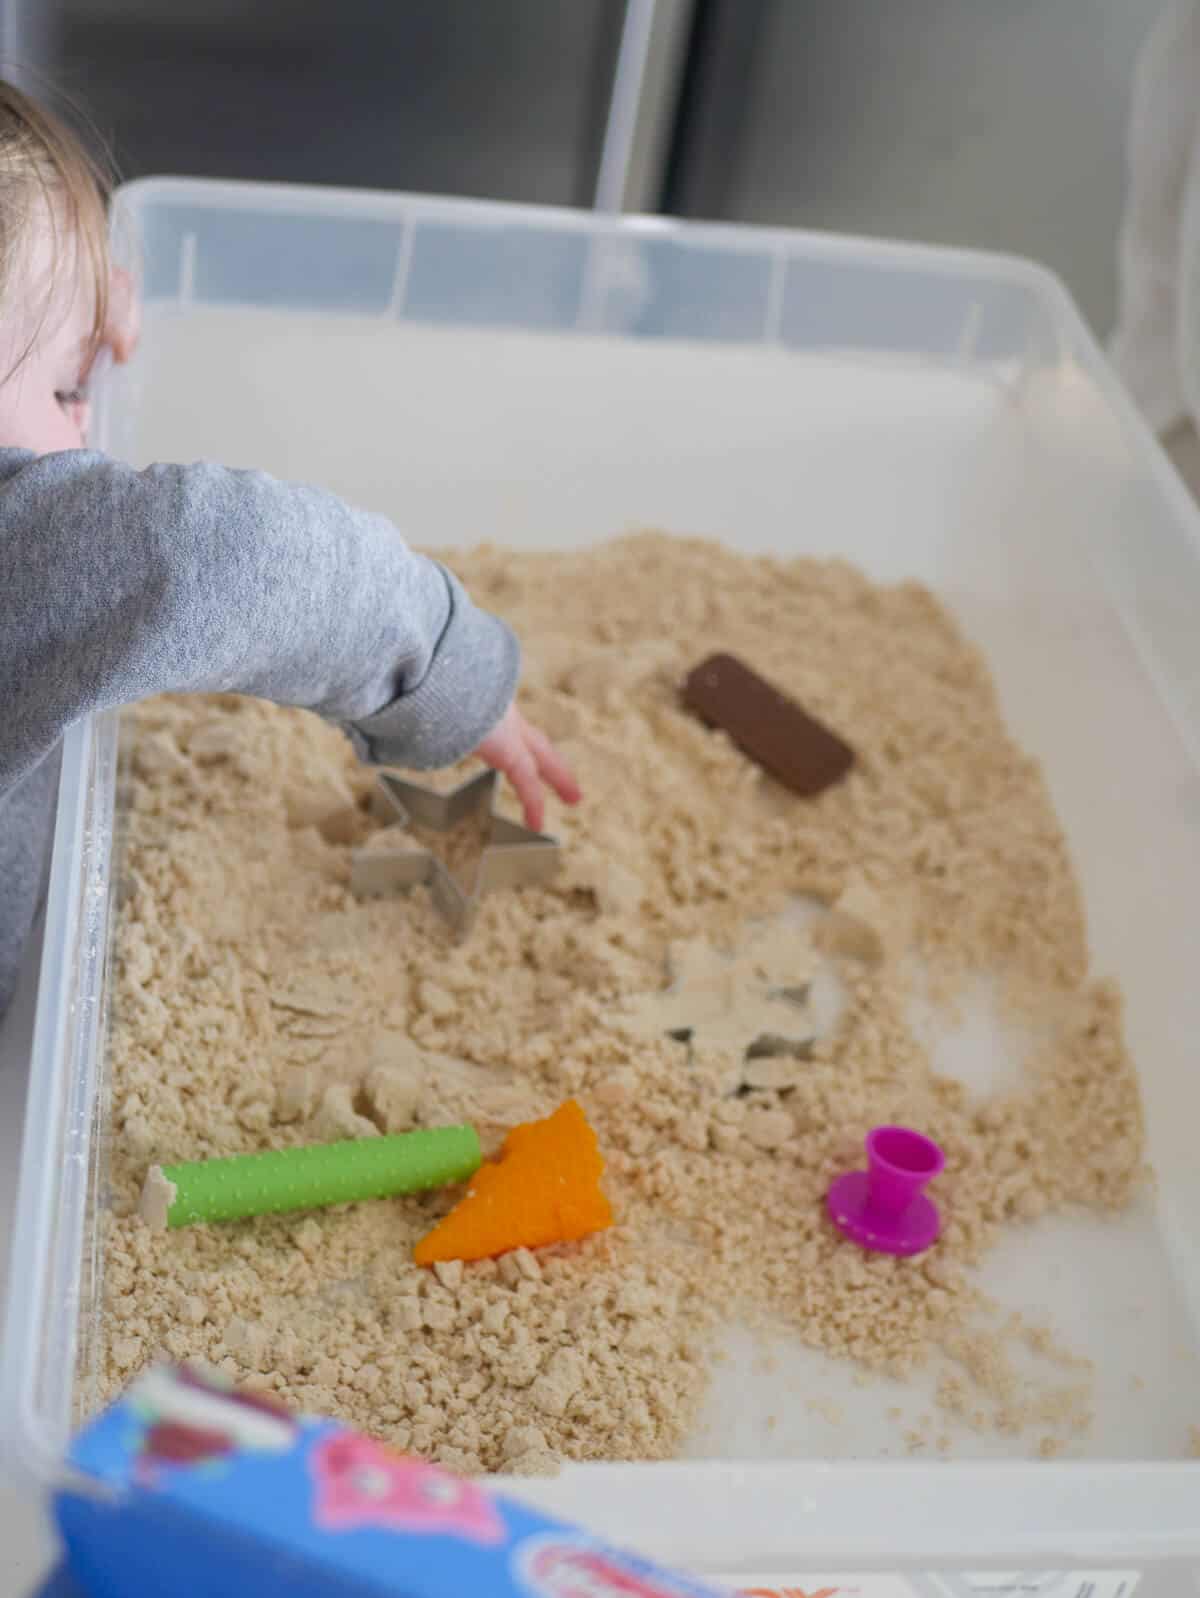
- Once ready transfer it to the sensory bin if you haven't already, add some toys and site back while your kids enjoy the play. (To see what toys to add check out Sensory Bin Ideas section)
Substitutions
This recipe is to make taste-safe homemade moon sand. Even though it only requires 2 ingredients there can be substitutions to the ingredients.
- Flour - use gluten-free flour or cornstarch. You may need to adjust the amount of oil you use but judge that as you go.
- Taste safe vegetable oil - We use vegetable oil but you can also use canola oil or olive oil. Use coconut oil only if you live in warm climate where it won't solidify.
- Baby oil - baby oil is not taste safe and it usually contains a number of toxic ingredients. I would personally never use it due to those reasons but I see that a lot of recipes use it so I thought it was worth mentioning it here. If you do choose to use it then the ratio of flour to oil is the same - 8:1.
Variations
You can add food coloring to the mixture to make it more exciting.
In this recipe we use 8 cups of flour and 1 cup of oil. Since this is an oil based recipe the water based food colorings won't work but powdered based might.
You can try adding this plant-based powdered food colorings and still make the recipe taste-safe.
Storage
Once made I place the sand in the sensory bin and when play is finished I cover it with the box lid, together with the toys or without. It can keep for a long time if stored properly.
Make sure no moisture is in the sensory bin when you add the sand or on any of the toys.
If it starts to smell weird and off then it is time to throw it away.
Even though the sand is edible I would still try (crucial word is try) and not have my kids eat it after first use. Depending on when you next take it out for play it may already have gone off.
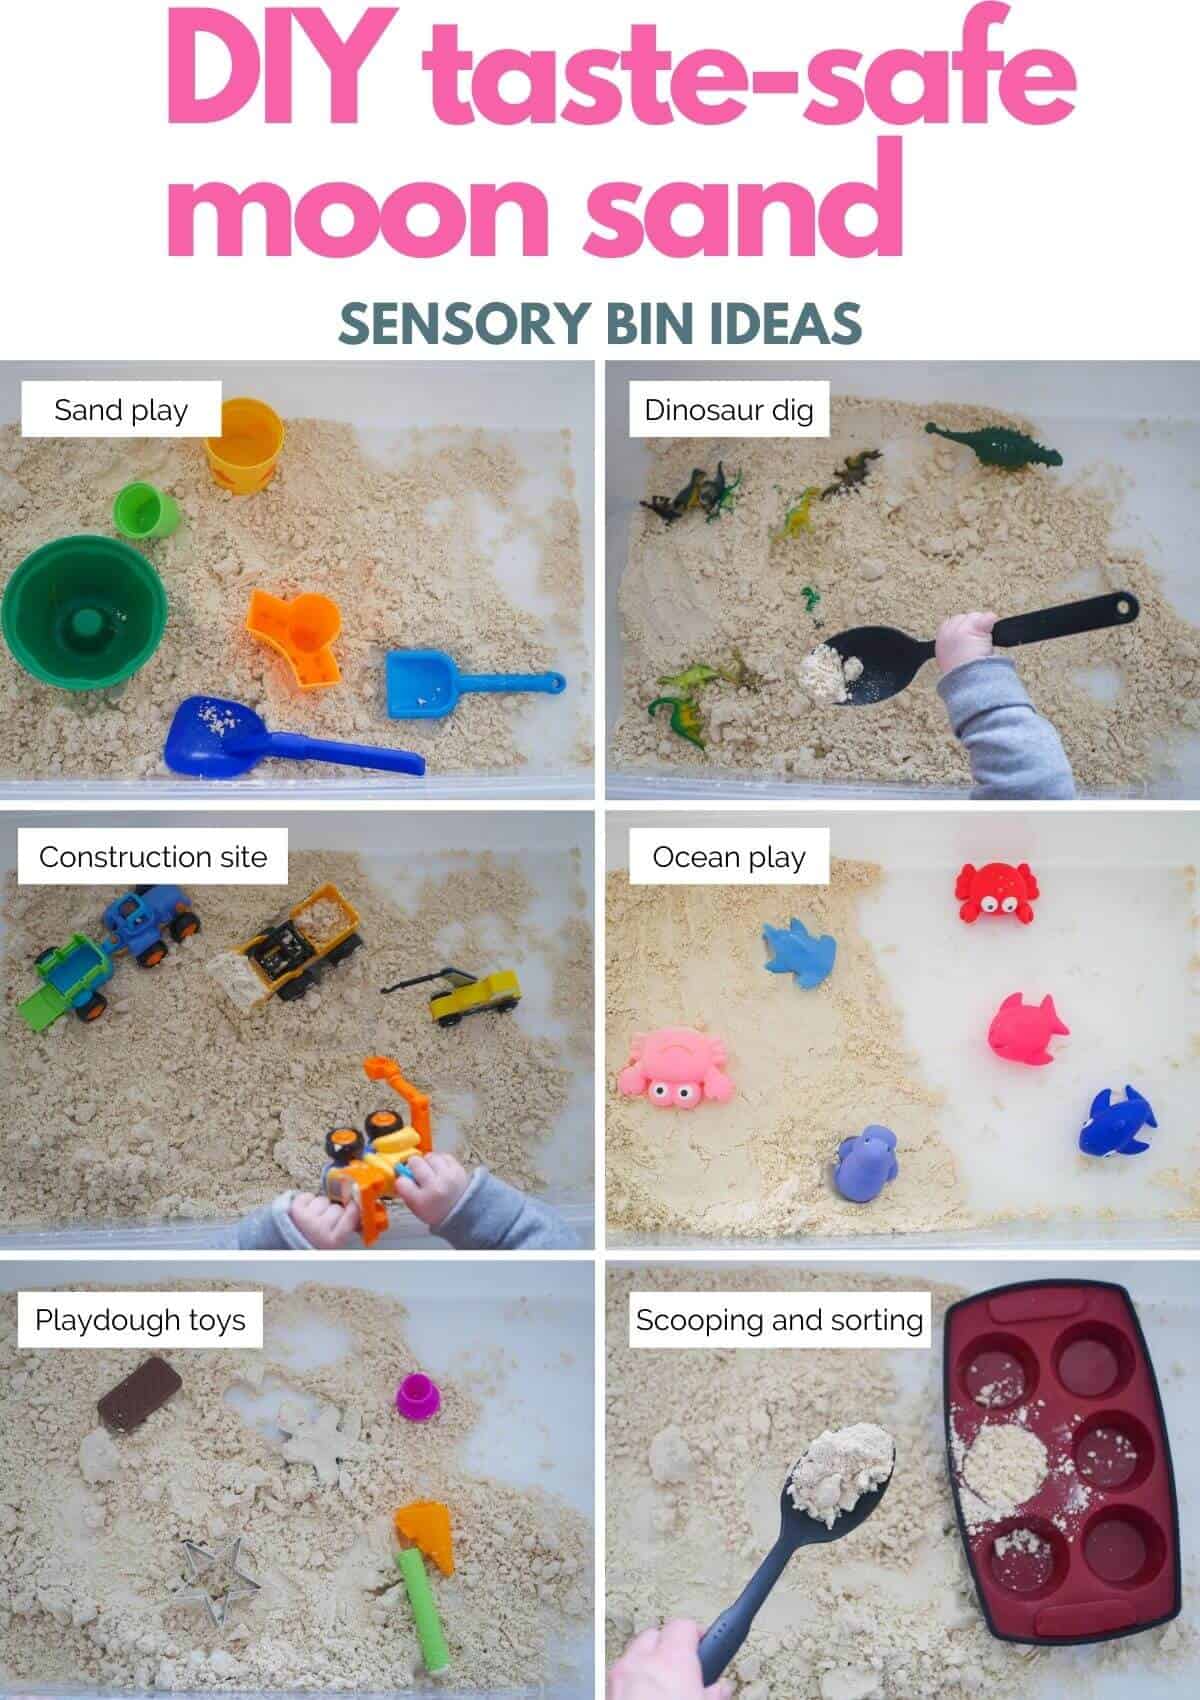
DIY Moon Sand Sensory Bin Ideas
The below activities include links for toys that you can add to the sensory bins.
- Regular sand play - take all the toys you would for a regular sand pit and let the kids dig, make shapes and castles. Add some shells for an even more fun experience.
- Play dough - place all the tools you have for play-dough, or in the kitchen and add the to sensory bin. Such as measuring cups, cookie cutters, different molds, spoons and anything else you may find in your kitchen.
- Construction site - bring out the construction site vehicles and let the toddler dig and transfer the "gravel" from one to the other
- Dinosaur dig - hide dinosaurs and let the toddler find them
- Scoop into muffin tins - great fine motor activity. Place a muffin tin in the middle and give them a spoon to spoon the sand equally into each muffin tin.
- Ocean plan - imaginative play for older kids with ocean animals (more for ¾+ kids)
More toddler activities

Taste-safe DIY Moon Sand Recipe (2 ingredients)
Ingredients
- 8 cups flour
- 1 cup sunflower oil
Instructions
- Preheat the oven to 350°F / 180°C . One the oven is heated place the flour on a baking sheet and place in the oven for about 5 minutes. The FDA states that the bacteria in the flour is killed at 350°F.
- Remove from the oven and place in the container that you be using as a sensory bin or in a large enough bowl to contain it all.
- Add the vegetable oil and mix until all is incorporated. ADD HOW LONG IT WILL TAKE
- Once it is all mixed through it should easily hold its form when you squeeze it, and then break up back into sand. If the mixture is too wet add more flour and if it is too crumbly add more oil.
- Once ready transfer it to the sensory bin if you haven't already, add some toys and site back while your kids enjoy the play. (On toys to add check out _____ section)
Notes
- use powdered food coloring to color the sand
- use gluten-free flour to make it gluten-free
- can use olive oil, canola oil or baby oil (if using baby oil it will not be taste-safe)
- if stored properly in an airtight container it can last a long time
Brittney
I think in step 3, you forgot to “ADD HOW LONG IT WILL TAKE”
😉 I will give this a go!